
常用命令
| |
Hugo链接
官方文档: https://gohugo.io/documentation/
官方git: https://github.com/gohugoio/hugo
Hugo+Stack 环境配置
我们选用的是stack主题: https://github.com/CaiJimmy/hugo-theme-stack
快速入门版本
最开始,我们使用的是stack官方给的快速上手版本:https://github.com/CaiJimmy/hugo-theme-stack-starter ,这个版本直接使用 Hugo module 给串联起来,并且可以直接使用 GitHub 的 codespace 直接上手写博客。
但是用这种版本会有一些问题:
- codespace启动较慢,不如本地写
- 因为没有用源码,所以要么是自己fork一份stack theme再改自己仓库对应的主题地址,要么就不能对主题进行定制化修改
基于此,最后我还是选择了源码+本地环境配置的写法。当然 codespace 仍然是可以用的。
本地环境配置
安装hugo
根据官方建议,我们选择下载扩展版本: 根据我的本机环境,我下载的是hugo_extended_0.120.4_windows-amd64.zip版本。
安装完成后可以用
hugo version查看版本,检查是否安装成功。安装go语言
hugo选择是go作为构建语言,这种编译型的语言有着天然的速度优势,因此几乎可以做到实时预览,这也是我选择hugo的主要原因。
初始化博客环境
hugo new site blog这样就会新建立blog文件夹,并且包含hugo的基本环境。
下载主题源码
我这里选用的stack主题,直接在stack的仓库拉一份release版本的,放在我们刚刚的博客环境中的themes文件夹中(若没有则新建)。
一般主题都会有一个 exampleSite 文件夹,拷贝到博客根目录就ok了。
CI流程
博客仓库托管于 Github,我们自然是使用 Github Action 进行自动部署的 CI(continuous integration)流程。事实上,前面的stack快速版本就已经给了这样的文件了。
但是不幸的是他还有点问题,他的部署流程使用的是 JamesIves/github-pages-deploy-action@v4,但是我没有成功。我最后改成了使用 peaceiris/actions-gh-pages@v3:
| |
关于TOKEN
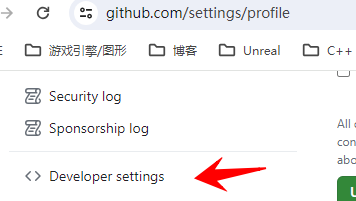
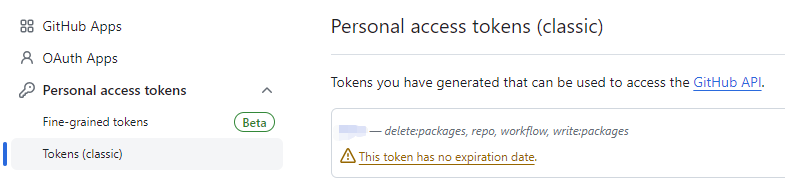
这里需要注意,我们应该给token对应的权限以让他可以使用 GitHub Workflow(而之前hexo的部署是使用hexo指令的,就没有加权限的步骤)。
使用多个主题
本地可以这样测试:hugo --config=config-HEngine.yaml server
使用多个config以指定不同的theme。
https://github.com/peaceiris/actions-gh-pages/issues/324
关于stack主题
文档:https://stack.jimmycai.com/config/menu
说明
- 博客中链接需要单独起一行才生效。
- 如果创建多级文件夹时文章文件名不是
index.md或者类别、标签文件名不是_index.md的话,设置封面图片会出现问题。
扩展
代码块
tab为4个字符宽不生效
参考:
https://discourse.gohugo.io/t/chroma-syntax-highlighter-and-tabwidth/31455/5
需要在 themes\hugo-theme-stack\assets\scss\partials\highlight\common.scss 后面添加:
| |
开启waline评论
主要见此链接: https://waline.js.org/guide/get-started/
一直配置完 Vercel 部署这一步:

点击 Visit,此时的网址即为服务端地址,然后直接填到 Stack 模板中:
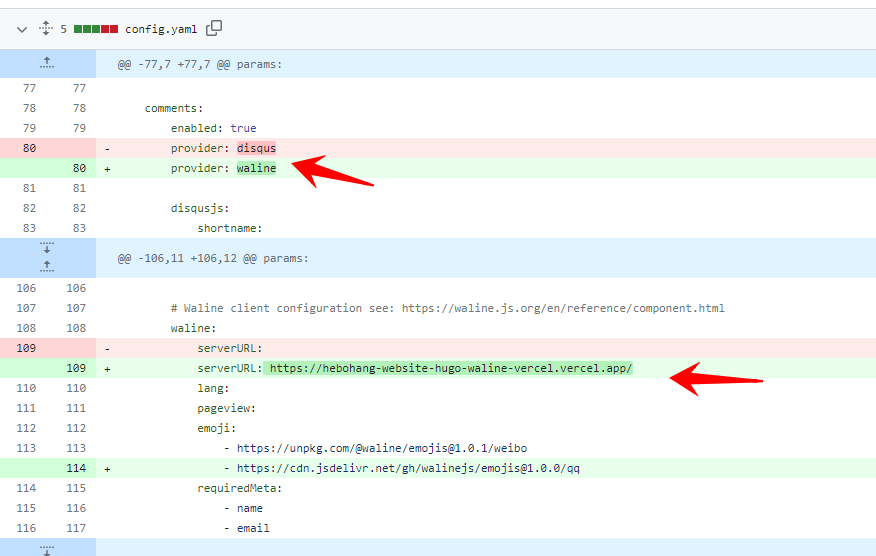
即可开启 waline 评论。
Sub Category
我一直想要这个功能,目前看到最漂亮的是 Jekyll 的主题 chirpy,演示Demo: https://chirpy.cotes.page/
但是 Hugo 似乎支持的不好,看到一个一样想法的相关讨论: https://discourse.gohugo.io/t/categories-sections-with-hierarchy/3058
但是 Hugo 也看到一个移植过来的主题实现了这个功能: https://github.com/kakawait/hugo-tranquilpeak-theme
之后再试试。
归档三栏
在 /assets/scss/custom.scss 中加入以下代码:
| |
参考: https://www.xalaok.top/post/stack-modify/#%E5%8F%8C%E6%A0%8F
最后更新时间
hugo-theme-stack\layouts\_default\single.html

但是这里我在 single.html 中加了总有点不对,去掉也能作用,只是没有按照想要的格式,按照默认的格式去作用的。 后来发现只是本地测试正确,部署之后显示还是不太对。目前没有启用这一功能了。
参考: https://blog.yfei.page/cn/2021/03/lastmod-hugo/
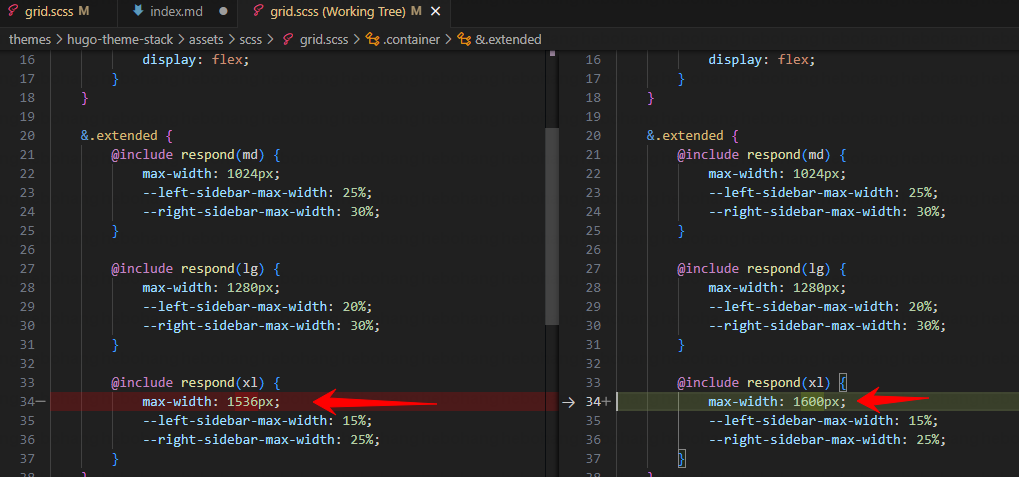
页面宽度
调整 themes\hugo-theme-stack\assets\scss\grid.scss
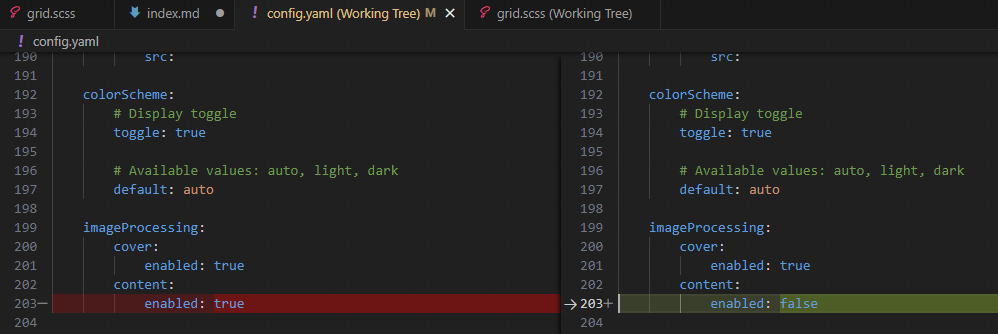
图片糊
我把这里调成false就好了:
更进一步或许该参考: https://gohugo.io/content-management/image-processing/